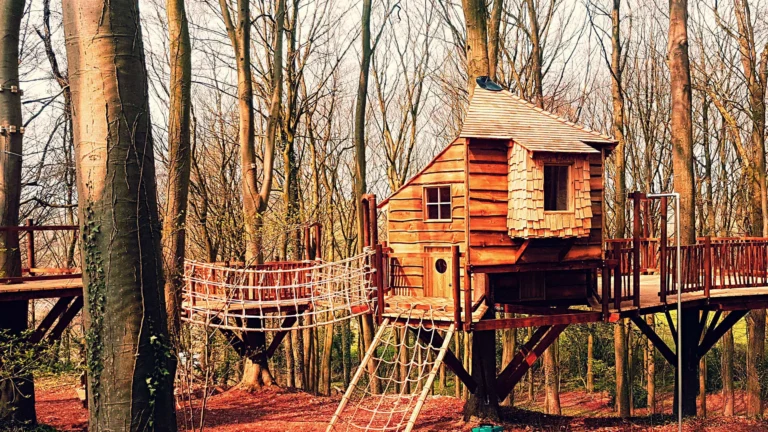

Add a zipline to a treehouse design at the planning stage. Treat it as a separate piece of moving play equipment, not as an accessory to attach once the treehouse is built. Its route, supports, landing area and braking system all need to work together.
The first step is to assess the site and decide whether a zipline is suitable. Then ask a competent designer or installer to plan the equipment for its users and setting. Do not use this article as an installation guide or improvise cable tension, anchor points or braking.
1. Assess the garden before choosing a route
Walk the proposed route from the platform to the landing area. Check for trees, branches, fences, walls, sheds, paths, ponds, slopes and overhead services. Consider how the garden is used when the zipline is not in use, and whether people might cross the route.
Plan a clear area around the full cable run and landing point. Keep it free from hard edges and objects that a rider could strike or fall onto. Include space for a person to wait at the start and to leave the landing area after a ride. Keep the route away from regular walkways and other play equipment.
Check the ground as well as the view from the treehouse. A route that looks clear from above may pass close to a low branch, garden furniture or a boundary at rider height. Ask the designer to consider the possible fall area along the full run, not just directly beneath the cable.

2. Plan the treehouse and zipline together
Decide where the zipline will start before finalising the treehouse platform, access and handrails. The start point needs to support safe boarding without blocking stairs, ladders or other routes around the structure. The landing point needs enough room for a rider to stop and move away from the run.
Do not assume that a treehouse platform, deck or handrail can carry the forces created by a zipline. Have the planned support points and connections assessed for the loads involved. The designer may recommend supports that are separate from the treehouse structure, or may include suitable supports in the overall design. Use only a solution that has been assessed for the specific installation.
Consider how the trees will change over time. Trees can move, grow and become damaged. A support design must account for the actual tree and attachment method, and the condition of the tree should be checked during regular inspections. Do not attach a cable to a tree, platform or post simply because it appears sturdy.
Squirrel Design creates bespoke structures to suit their setting and the client’s requirements. See our treehouse design and construction service and tree climbing adventure project for examples of tailored play features designed around trees.
3. Choose equipment for the users and setting
Select a complete zipline system intended for the type of installation you are planning. Check the manufacturer’s age guidance, maximum rider weight, number of users, suitable supports and installation instructions before choosing a route or structure.
Do not combine parts from different systems unless the relevant manufacturers or a competent designer confirm that they are compatible. The cable, trolley, seat or handle, fixings and brake need to work as one system. Ask the supplier to explain the intended use and provide instructions for installation, inspection and maintenance.
Plan for the people who will use the zipline. Consider their age, height, ability and confidence, as well as who will supervise them. Set clear rules for waiting, riding and leaving the landing area. If the equipment is for a school, visitor site, holiday accommodation or another shared setting, seek advice from a competent play-equipment professional about the standards, inspection and risk-management requirements for that use.
The HSE’s guidance on children’s play supports a balanced approach: control real risks while preserving the benefits of play. Use it as a starting point, not as a substitute for product instructions or site-specific professional advice.
4. Design for a controlled ride
Ask the installer to specify the cable route, supports, clearances and braking system for the chosen equipment. Do not set the route or tension by eye. The correct setup depends on the product, support points, route, rider limits and site conditions. Follow the manufacturer’s instructions and any assessment made for the installation.
Use the braking system specified for the equipment. Do not rely on a rider’s feet, a tree, a cable clamp or an improvised stop to slow the trolley. Do not increase cable tension to try to make the ride faster or reduce sag. Changing these details without approval can affect both the equipment and its supports.
Ask the installer to explain how riders board, hold on, travel and dismount. Make sure the system has a clear operating procedure and that a supervising adult can see the start and landing areas. Prevent another rider from entering the route until the previous rider has finished and moved clear.
5. Make the landing area part of the design
Plan the landing area before the zipline is installed. Keep it clear of obstacles and give riders space to stop, get off and leave safely. Choose an appropriate impact-absorbing surface based on the equipment instructions, the fall risk and the site. Keep that surface in good condition.

Check the area from different angles and at the height of a rider. Remove or relocate furniture, planters, toys and other items that could become obstacles. Keep the landing area away from doors, paths and other activities. If the ground slopes or the route crosses a boundary, ask the designer how that affects the layout.
Make space for an adult to supervise without standing in the route. Store any loose equipment, such as removable seats or handles, where it cannot become a trip hazard.
6. Set rules and supervision before first use
Post or share the manufacturer’s operating instructions with the people who will supervise the zipline. Set clear rules for who can ride, how many people may use it at once, where to wait and when to use it. Follow the product’s age and weight limits.
Supervise children according to their age, experience and the equipment instructions. Check that the route is clear before each ride. Stop use if the rider cannot follow the rules, the weather affects safe operation, or someone enters the route or landing area.
Do not let riders carry bags, toys or other loose items unless the manufacturer specifically allows them. Keep hands, clothing and hair away from moving parts. Teach riders to wait until the previous user has moved away before starting.
7. Inspect the system and stop use when needed
Follow the manufacturer’s inspection schedule. Before use, check the cable, trolley, seat or handle, fixings, supports and braking system for visible damage or movement. Look for fraying, kinks, loose connections, cracks, corrosion and unusual movement in trees or posts.
Arrange a competent inspection at the intervals recommended by the equipment supplier, and after an event that may have affected the installation. Keep a record of inspections, maintenance and repairs, especially for shared or public use.
Stop use immediately if a support moves, a component is damaged, the brake does not work as expected, or the ride behaves differently from normal. Do not repair, adjust or return the system to use until the problem has been assessed and resolved.
Squirrel Design’s woodland retreat project shows how elevated play features can be planned around a woodland setting. A zipline needs the same attention to the trees, layout and people who will use the space.

Plan the zipline before building
Integrate the zipline into the treehouse design from the start. Assess the site, choose equipment for the intended users, have the supports and route professionally planned, and provide a clear landing area. Follow the manufacturer’s instructions and maintain the equipment as directed.
For a bespoke treehouse or outdoor play structure, contact Squirrel Design to discuss your garden, site requirements and design options.